
A campaign sends a sequence to a selected audience from connected sending accounts. Before you start it, check the audience, sender, sequence, schedule, and delivery settings.
Before you begin
You need access to Campaigns, a cleaned audience, at least one connected sending account, and enough plan capacity for the planned sends. Verify contacts, check that the sender is healthy and warmed up, and choose the right timezone and sending days.
Create the campaign
- Open Campaigns from the left navigation.
- Select Add New.
- Enter the internal name in Campaign Name, then select Continue >. This identifies the campaign in the workspace; it is not automatically sent to recipients.
- Review the new draft and open the campaign detail tabs.
- Open Leads and add an existing list, import leads, or add leads from SuperSearch. Remove duplicates and exclude leads that should not be contacted.
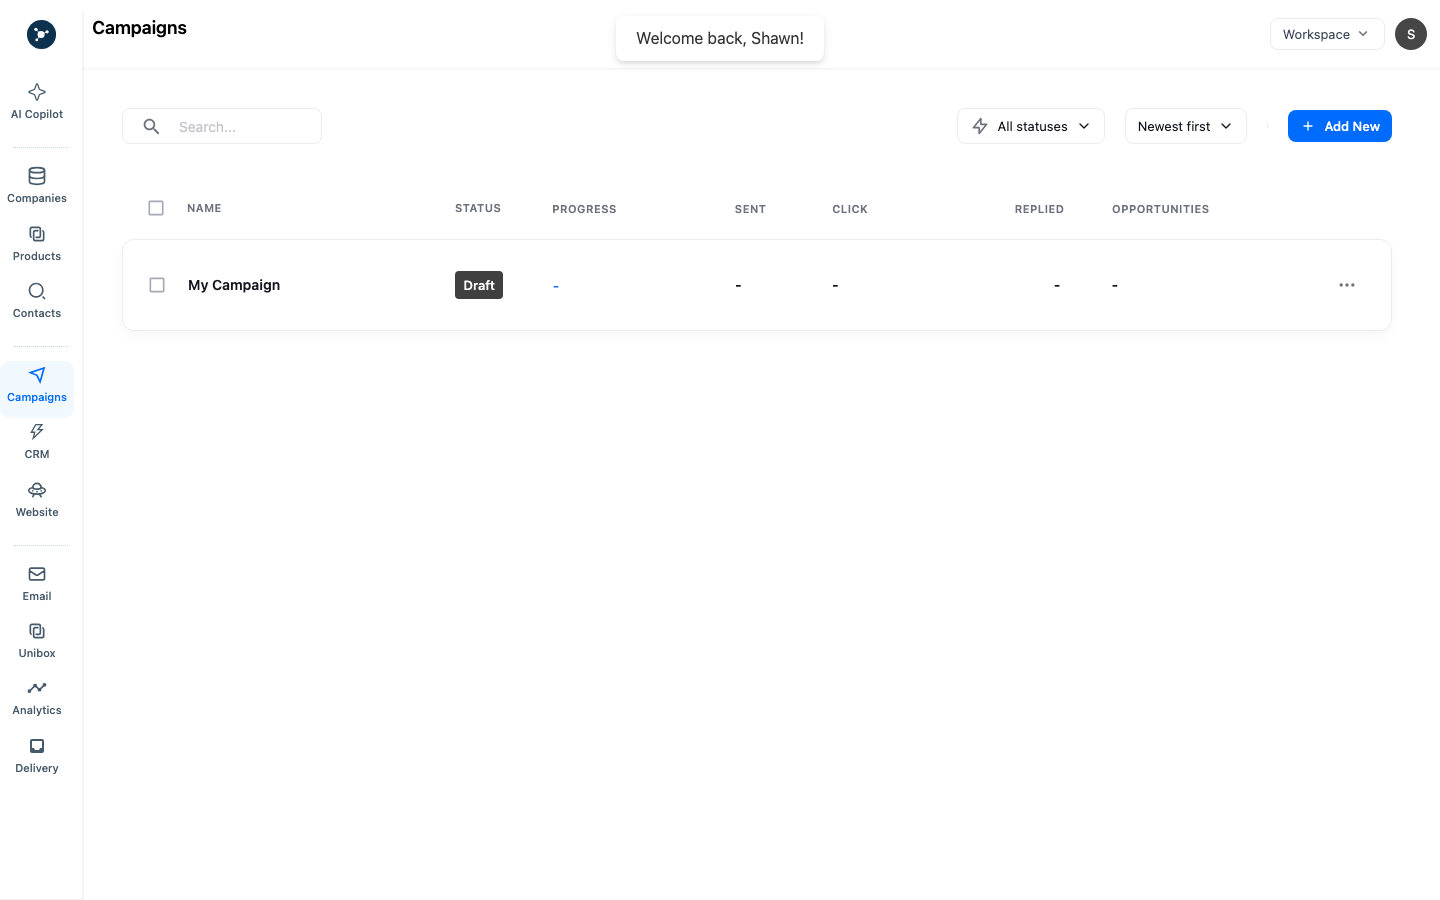
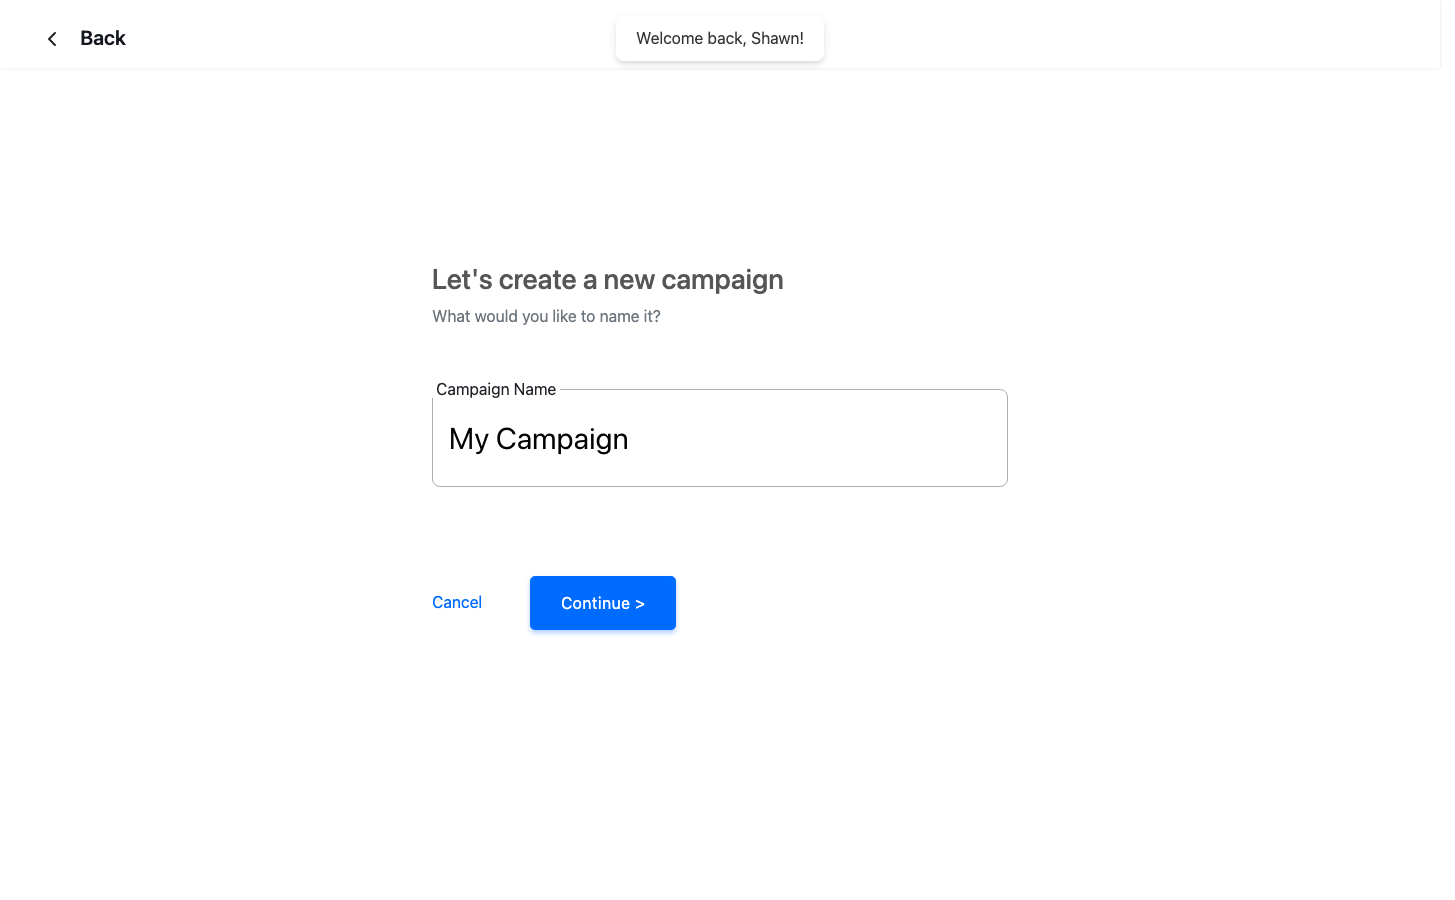
The modal creates a draft; it does not start sending. Fill in the required name and audience fields before continuing.
You can edit the draft. Adding a lead does not send the first message.
Build the sequence
- Open Sequences.
- Add the first email step and write the subject and body.
- Insert only variables supported by the campaign editor. Preview a lead with missing data and define fallback values where supported.
- Add follow-up steps and set the delay between each step.
- Keep the thread setting consistent with the conversation you want to create. Use text-only or media options only after checking their deliverability impact.
- Save, preview, and send a test email to an internal address.
The editor saves the sequence in the campaign draft. A follow-up is scheduled after the previous step; adding it does not send it immediately.
Configure Options
Open Options and review the controls exposed by the workspace:
| Control | What to check |
|---|---|
| Sending accounts / inbox rotation | Select the connected accounts allowed to send this campaign. Confirm each account is authorized and within its limit. |
| Daily limit | Set a campaign-level ceiling that fits the selected accounts and workspace policy. |
| Prioritize new leads | Decide whether first-step leads can run before scheduled follow-ups. |
| Max new leads | Bound how many new leads can enter the sequence; a negative value can be used for follow-ups-only behavior where supported. |
| Company send limit | Prevent too many contacts at one company from being emailed in the same period. |
| Tracking and unsubscribe | Review open/link tracking, text-only delivery, and unsubscribe behavior before launch. |
Some controls are plan-gated or inherited from Settings → Advanced Deliverability. If a control is disabled, resolve the entitlement or workspace setting instead of assuming the campaign saved the change.
Configure Schedule
- Open Schedule.
- Set the start date and optional end date.
- Select the sending days and time window.
- Confirm the timezone shown by the schedule.
- Save and check the next eligible send time.
Outside the schedule, the campaign can remain active without sending. Account limits, slow ramp, verification, and sequence delays can also postpone a send.
Launch and monitor
- Review Leads for invalid, risky, blocked, or already-contacted statuses.
- Review Sequences, test rendering, links, variables, and unsubscribe behavior.
- Review Options and Schedule again.
- Launch the campaign and confirm the status changes from draft to the active state shown by the app.
- Open Analytics to review queued, sent, delivered, bounced, opened, clicked, replied, and opportunity metrics that are available for the campaign.
- Open Unibox to classify replies and create the next CRM action.
Use Pause when you need to stop future sends temporarily. Resume only after checking the sender and queue. If the UI provides stop, archive, duplicate, or edit actions, confirm the resulting status and revalidate before sending again; an edit may affect only future steps.
Troubleshooting
- No sends: check campaign status, schedule/timezone, account connection, account and campaign limits, warm-up, and lead eligibility.
- Only follow-ups send: review Max new leads and Prioritize new leads.
- Variables are blank: inspect the lead fields and configure fallback values; do not send a test using an unrepresentative record.
- Replies are missing: check the connected account, reply synchronization, Unibox filters, and the troubleshooting guide for replies.
- Bounce or risk warnings: stop the launch, verify the audience, and follow the sender-health guidance before retrying.
What happens next
Move interested replies into CRM, assign an owner, create a task or opportunity, and keep the information and campaign source in the record. For campaign errors, use usage and entitlement troubleshooting.
Validation and status reference
| Check or state | Meaning | Action |
|---|---|---|
| Draft | The campaign is editable and does not send. | Complete Leads, Sequences, Options, and Schedule. |
| Active/running | The campaign is eligible to send within its schedule and limits. | Monitor Analytics and Unibox; pause before changing audience or sender. |
| Paused | Future sends are stopped. | Fix the cause, review the queue, then choose Resume when available. |
| Completed/stopped | No further sends are scheduled. | Duplicate or create a new campaign if another run is needed. |
Before launch, resolve every validation message. A campaign needs at least one eligible lead, a connected authorized sending account, a sequence with a valid first step, and a schedule. The visible controls and limits can vary by workspace plan; record the value shown in the UI rather than assuming a universal limit.
Field checklist
| Area | Required before launch | Review |
|---|---|---|
| Leads | At least one eligible recipient | Remove duplicates, invalid addresses, blocked contacts, and prior recipients. |
| Sequences | First message and any follow-up delays | Preview variables and send an internal test. |
| Options | Sending accounts and daily/new-lead limits | Check rotation, tracking, unsubscribe, and company send limits. |
| Schedule | Start date, days, window, and timezone | Confirm the next eligible send time. |
Pause, resume, and stop
Choose Pause to stop future sends while keeping the campaign data. Review sender health, schedule, and lead eligibility before Resume. If Stop, Archive, Duplicate, or Edit is offered, read the confirmation dialog: stopping can prevent remaining steps, while editing may apply only to future sends. Verify the resulting status in the campaign header and confirm Analytics no longer shows new sends when paused.